-
-
- Tanning Pool
- Go to Tanning Pool
- Shop All
- ♾️ Size
-
♾️ Shape
- ♾️ Shape
- Go to ♾️ Shape
- Rectangle
- Round
- Oval
- ♾️ Color
- 2025 UPGRADE
- Electric Air Pump
- Above Ground Pools
- Sale
SUP Video Instructions | SLOOSH Paddle Board Setup & Tutorials
Master Your Paddle boarding Experience with SLOOSH SUP Tutorials! 🚀
Welcome to SLOOSH's SUP Video Instructions, your go-to guide for effortless paddle boarding! Whether you're a beginner or an experienced paddler, our step-by-step video tutorials will help you set up, inflate, and maintain your paddle board with ease.
-----
Explore Our SUP Collections:
🔹 Ripple™ Series – Paddle Easy, in Style.
🔹 Meander™ Series – Paddle your way, in style.
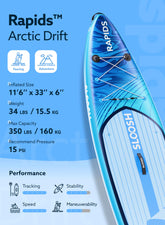
🔹 Rapids™ Series – Paddle Beyond, in Style.
------------
🛠️ INSTALLATION - Steps to Prepare Your SLOOSH SUP!
Step 1️⃣ Unroll Your SUP
Take out SUP, pump, paddle, and accessories. Unroll the SUP on a clean surface.
Step 2️⃣ Set Valve to Inflate Mode
Remove the valve cap. Ensure the pin is in "inflate" mode; press and twist to switch if needed.
⚠️ WARNING: Inflating in "deflate" mode will cause air leaks.
Step 3️⃣ Attach the Pump Hose
Connect the pump hose to the valve and twist clockwise to secure. Attach the other end of the hose to the pump’s ‘inflate’ port.
Step 4️⃣ Pump in High Capacity Mode
Keep the pump’s center cap on for Double Action mode (pumps air on up and down strokes). Pump until it’s difficult to pump during up stroke.
📝NOTE: Gauge may not show pressure until ~3 PSI.
Step 5️⃣ Switch to High Pressure Mode
Remove the center cap for Single Action mode (pumps air only on down strokes). Pump until 15 PSI.
📝NOTE: Do not exceed 15 PSI. Use lower pressure for extended use in direct sunlight or high temperatures. Step
6️⃣ Detach the Pump Hose
Twist the hose counterclockwise 90° and remove. Replace the valve safety cap immediately. Expect a small burst of air when disconnecting.
📝NOTE: Detach quickly to minimize air loss.
Step 7️⃣ Attach the Leash
Secure the leash at the end of the board by threading the small loop through the D-ring and doubling it back through itself.
📝NOTE: Make sure the leash is properly attached in order to prevent losing the board in waves.
Step 8️⃣ Install the Fins¹
Flip the board over. a) Slide each fin into its fin box with the pointed end of the fin facing the back of the board. b) Secure by inserting the clip through the locking hole.
📝NOTE: Avoid putting weight on fins when moving or setting down the board.
¹Ripple™/Meander™ Series: 3 fins. ¹Rapids™ Series: 1 fin
Step 9️⃣ Assemble the Paddle
Connect paddle parts, ensuring any spring tab or lever locks in place². Adjust to your height, then lock all levers. Rapids™ Series only: The paddle can also be converted to a kayak paddle by attaching the extra blade.
📝NOTE: If loose, unlock the lever, tighten clockwise, and re-lock.
SLOOSH aims to deliver a splash of paradise wherever you are
Delivered in a splash
Premium made simple
Fun, guaranteed
- Choosing a selection results in a full page refresh.


